
Renovation Diary: Making Room For A New Master Bathroom

Dissecting the layout may reveal easy ways to “steal” space from your floorplan."
Now that you have seen some before pictures of “Victory Farms”, in this blog you will see demolition under way for the home transformation. With the walls opening up, I can start adding ideas to my design software. In this three bedroom home, there was not a designated master bedroom, nor was there a master bath. However, one of the three bedrooms upstairs had two smaller walk-in closets opposite each other. I was certain one of the closets had an open cavity behind one of the interior walls that could hopefully turn this space into a master bath. The blueprints, and the roof line, hinted to some open space I could develop into a new master bathroom.
The next step was to have my demo team open up the wall to see what we were dealing with, and, BINGO! We found an open cavity behind the 5 x 5 closet that already existed. To make a new master bath we incorporated the open cavity, the 5 x 5 closet and 2×8 space from an adjacent guest room.Of course, this made the guest room smaller. So, we demoed the existing closet on the opposite side of the room that ran from one side of the room to the other, which was a ton of wasted space.
We “stole” about 2 feet from this guest room to combine with the open cavity behind the original closet along with about 5 feet of the master bedroom closet to accommodate a brand new master bathroom.]
This area, formerly one of the two closets belonging to the room that we chose to make the master, was knocked down to add to the new master bathroom.


Later, I added a smaller closet in the guest room sharing space with the new master suite bathroom closet. We would later reverse the entry door to accommodate the new layout for the guest room. After confirming the extra space, I returned to my office and put together several virtual layouts for V, the homeowner. On her wishlist: a large shower, linen closet and a two-person vanity. To get some extra head room we had to make adjustments to the roof joists. We added three small LVL supports which added some extra costs to this project. But the additional cost would give us an amazing master bath, and give V a great return on her investment.
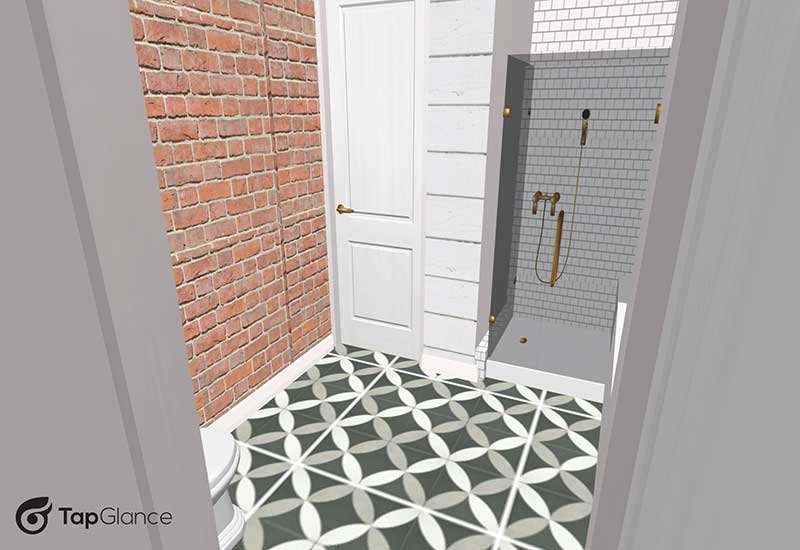
But now for the fun stuff - how it will all look! Here’s an overall of the new bathroom remodel complete with shiplap and brick for the walls and patterned tile for the floors.
Here is the shower framing going in. Beside it is the linen closet.

How the same area will look after it’s done!

To create a new master bathroom, we also had to come up with a plumbing, HVAC, and electric plan for the new space. The good news is we were able to accommodate the plumbing for this new bath right below the subfloor through the kitchen. Instead of tearing out additional walls and accruing additional costs, we incorporated the plumbing alongside an exposed structural beam that ran above the kitchen island I was designing. V was extremely happy with the cost saving plumbing idea which allowed her to use additional funds towards the finishes, extra drywall, demo, and repair. I love the opportunity to give the client what they are looking for on a budget that fits their needs.
The framing going in for the walk-in shower!

This walk-in shower, once it’s completed, will have shiplap on one wall, and subway tile on the other two along with a built-in bench.

After the closet space was fully gutted, along with the additional space we inherited, we were able to give V a full 8 x 11 bathroom.


That might sound small, but once you see the final pictures in blogs to come, you will see how this beauty transformed and how we used every inch of space. In the upcoming blogs about the kitchen, I will also show you how we hide the plumbing and tie the beam to the rest of the downstairs. Stay tuned for our next update! Planning a home renovation project? Contact us today!