
Victory Farms: Bathroom Remodel & Reveal!

Over the past few weeks, we’ve been renovating a Lakehouse in New Buffalo, Michigan. You can catch up on past posts here and here. All the demo has been done and we’ve even gotten some good surprises. But now for the fun stuff, this week we are done with the bathroom remodel at Victory Farms. In my prior blog, I discussed how my team and I decided we could put in a curb-less shower to give V that ultimate wow factor. Like I have also mentioned in prior blogs, V wanted all her bathrooms to accommodate showers only. I knew when designing the main level bathroom that I could give her a large super sleek shower with that spa feel. I sat down with V to go through some of my design ideas regarding tile and colors. Since this bathroom is on the main level where I am using a lot of white shiplap, I wanted to follow suit by incorporating some shiplap on the walls. I also wanted to incorporate natural wood tone tile to give the bath that subtle farmhouse appeal. And now for the reveal.
If you recall, this is what the bathroom looked like before:

And here at long last is the redesigned space!
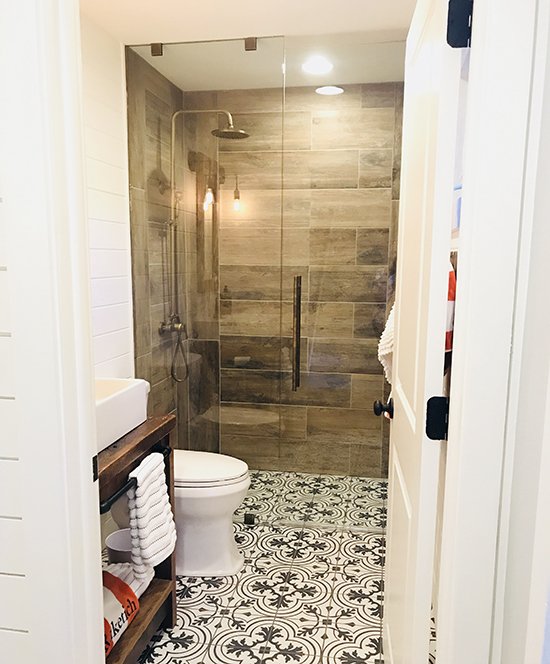
Knowing that the shower was going to be a nice size, I wanted to use a larger tile to make the bathroom feel substantial. I started by sharing 12” x 24” tiles for the shower walls with V that looked like actual barn wood. This was an easy decision made, she loved it! Since the shower floor was curbed less it would share the same tile that is on the floor. I really wanted this to be a statement and pop the rest of the room. I sent some ideas to V for a black and white vintage feel. This room was going to have a lot of foot traffic, so I leaned more towards porcelain vs concrete tile since concrete tile does not maintain well in the shower. After going through some options, the decision was to go with an 8” x 8” black and white tile that really complimented the barn-wood tiles.
As for the finishes, since I really don’t like being traditional, I showed V some antique brass finishes and they were a definite winner. I felt these finishes would really warm up the space and keep the vintage charm. I wanted to keep the vanity a real unique piece while picking up that natural wood look. Being said, I sketched up a design and sent over ideas to my friend Jen at Blue Moon Vintage Market a local reclaimed market and she was able to custom make me exactly what I wanted! I started searching for a white vessel sink to accommodate the size of the custom vanity. I also reached out to a really creative Etsy store who made custom barnwood mirrors that was able to make the size I needed to go above the vanity. Picking out the lighting was also super fun! After reviewing several options, V chose to go with the black industrial teardrop lighting for each side of the reclaimed wood mirror which was my favorite pick. My favorite part of the bathroom remodel for last: the shower glass. I wanted to make sure when walking into the bathroom it would feel like the glass didn’t exist. So, I met with my local glass company to show him what I was wanting to achieve. I ended up deciding on a 36-inch glass door with a 36-inch glass panel that would run to the ceiling. This gave us great height that would incorporate that invisible appearance. I chose antique brass clips and hardware for the glass that would blend with the overall finishes and wood tile so they would disappear vs standing out. V really loved my idea for the black industrial pipe for the stairwell, so I had my team make her toilet and towel accessories out of the same material which would really show off the black industrial lighting and tie in the space. Now that we had everything decided on for the main level bathroom remodel, my team started full force and I started to move on to the main level entry which you will read about in next week’s blog. V really wanted to have the main level bath complete before we started on the two upper baths so she could use the downstairs during construction. In my upcoming blogs, I will show you our decisions for the upstairs bathrooms along with the final photos. Stay tuned……